Page Attached App
Learn to attach CMS Console applications to pages with tree definitions
Download the sample app as a CMS Package
In this sample, you will learn how to create a console application that allows CMS Console users to manually attach it to a page in the Content perspective to specify page-related downloadable files like PDF files from the media archive.
- This sample requires a global data type to hold information about downloadable links.
- To add and edit items within the application, you need to create an edit form.
- The tree definition will allow attaching the tree of data elements under each page.
- Optionally, you may want to create a rendering function to add to pages. The function will present the download links on the page based on the data attached to the page.
Global data type
This sample requires a global data type with three fields: the link text, a reference to a media file and a reference to a page.
- Global data type:
- "Demo.C1ConsoleApps.Downloads"
- Fields:
- "Text": String (256).
- "Link": Data Reference (CMS Media File)
- "Page": Data Reference (CMS Page)
Please note that if you change the names used above, you’ll have to update the following tree definition sample accordingly.
Edit form
You need an edit form that will open when the CMS Console user will add or edit downloadable links to the page within the application.
The easiest way to create the form is as follows:
- Select the "Demo.C1ConsoleApps.Downloads" data type in the Data perspective.
- Click Edit Form Markup on the toolbar.
- Resave the markup.
This will create an edit form you need as ~/App_Data/Composite/DynamicTypeForms/Demo/C1ConsoleApps/Downloads.xml.
Tree definition
In ~/App_Data/Composite/TreeDefinitions, create an XML file: PageDownloads.xml.
Add this markup:
<ElementStructure xmlns="http://www.composite.net/ns/management/trees/treemarkup/1.0" xmlns:f="http://www.composite.net/ns/function/1.0">
<ElementStructure.AllowedAttachments ApplicationName="Downloads">
<DataType Type="Composite.Data.Types.IPage" Position="Top"/>
</ElementStructure.AllowedAttachments>
<ElementRoot>
<Children>
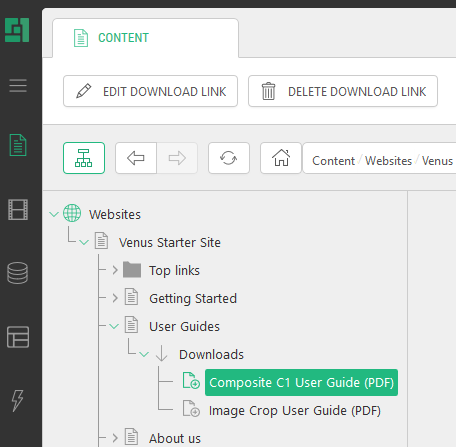
<Element Id="PageDownloadsRootId" Label="Downloads" ToolTip="Page-related downloadable files" Icon="down">
<Children>
<DataElements Type="Demo.C1ConsoleApps.Downloads" Icon="website-create-website-file">
<Filters>
<ParentIdFilter ParentType="Composite.Data.Types.IPage" ReferenceFieldName="Page"/>
</Filters>
<OrderBy>
<Field FieldName="Text" Direction="ascending"/>
</OrderBy>
<Actions>
<EditDataAction Label="Edit Download Link" Icon="website-edit-website-file"/>
<DeleteDataAction Label="Delete Download Link" Icon="website-delete-website-file"/>
</Actions>
</DataElements>
</Children>
<Actions>
<AddDataAction Type="Demo.C1ConsoleApps.Downloads" Label="Add Download Link" Icon="website-create-website-file"/>
</Actions>
</Element>
</Children>
</ElementRoot>
</ElementStructure>
As you can see:
- We’ve used an
<Element>to set the folder under a page and a<DataElements>to present the data items under the page. - We’ve also used the
<ParentIdFilter>to filter the data items by page. - The
<AddDataAction>,<EditDataAction>and<DeleteDataAction>add the corresponding buttons on the toolbar to manage download links. - The application can be attached manually to a page as defined by
<ElementStructure.AllowedAttachments>.
Rendering function
This is an optional step – to see how the data attached to pages can be used.
- Create an XSLT function named "Demo.C1ConsoleApps.Downloads.ShowLinks" in the Function perspective.
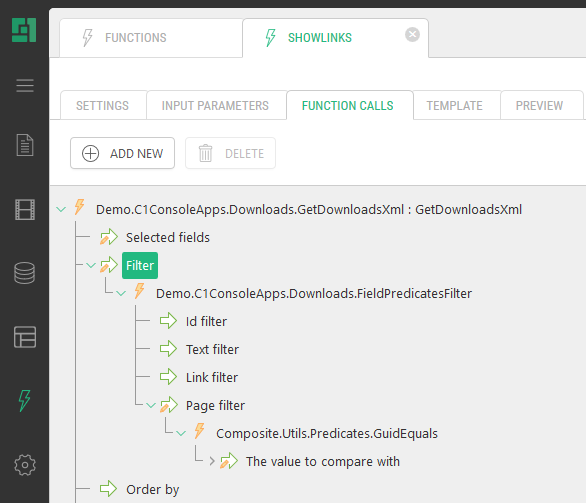
- On the Function Calls tab, add the "Demo.C1ConsoleApps.Downloads.GetDownloadsXml" function.
- Select the "Name" and "Link.Id" fields for this function call.
- Filter by the current page (Filter > Demo.C1ConsoleApps.Downloads.FieldPredicatesFilter::Page > Composite.Utils.Predicates.GuidEquals::Value > Composite.Pages.GetPageId).
- On the "Template" tab, add this markup.
<xsl:stylesheet version="1.0" xmlns:xsl="http://www.w3.org/1999/XSL/Transform"
xmlns:in="http://www.composite.net/ns/transformation/input/1.0"
xmlns:lang="http://www.composite.net/ns/localization/1.0"
xmlns:f="http://www.composite.net/ns/function/1.0"
xmlns="http://www.w3.org/1999/xhtml"
exclude-result-prefixes="xsl in lang f">
<xsl:template match="/">
<html>
<head/>
<body>
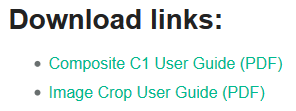
<h3>Download links:</h3>
<ul>
<xsl:for-each select="/in:inputs/in:result[@name='GetDownloadsXml']/Downloads">
<li>
<a href="/media({@Link.Id})"><xsl:value-of select="@Text" /></a>
</li>
</xsl:for-each>
</ul>
</body>
</html>
</xsl:template>
</xsl:stylesheet>Now you can insert the function on a page with download links provided, and see how it works.