
Customizing Datatypes
Localizing Data Types
Localization of data types follows the general localization rules in C1 CMS. Localization of forms created with Forms Renderer has its specifics. In the following sections we will cover both types of localization in detail.
Global data types and page datafolders are localized in the same manner; page metatypes are localized as part of localization of pages when used on the latter.
The focus of this guide is global data types; that is why the following procedures will be illustrated with these data types.
Localizing data types in C1 CMS implies localizing the data items these data types contain. If you add an item to a localized data type, you can switch to the other language in C1 CMS, translate the item and use it on its own on the localized website from now on.
The item in the main language and the item in the language you localize to will now co-exist. Hence, changes in the item in one language will not affect the item in the other language.
Before you can localize data items, you should enable localization on data types.
Enabling Localization on Data Types
To enable localization on data types and localize data items, at least two languages must be added to C1 CMS.
By default, data types created in C1 CMS are not localizable. Enabling localization on existing data types is different from enabling localization on data types being created.
Localizing Existing Data Types
To enable localization on existing data types:
- Select the data type.
- On the toolbar, click Enable Localization.
Figure 1: Enable Localization button on the toolbar
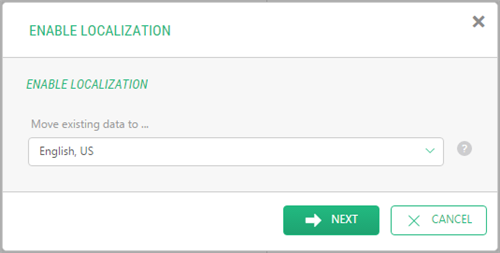
- In the Enable Localization wizard, select the “language” (locale) you want to “move” existing data items to.
Figure 2: Move existing data to a proper locale
When you enable localization on a data type, you should choose where to keep the existing data items. We recommend that you keep (“move”) the data items in the language you have created them in, which is often the default language in the system.
- Click Next and then click Finish to confirm your settings.

Now the data type has been localized, and the button on the toolbar for this data type is replaced with the Disable Localization button.

Figure 3: Disable Localization button on the toolbar
Before you go on to localize data items, learn how you can localize a data type you are creating.
Localizing Data Types Being Created
You can also enable localization on a data type while creating it:
- In the Data perspective, select Global data types and click Add Datatype on the toolbar.
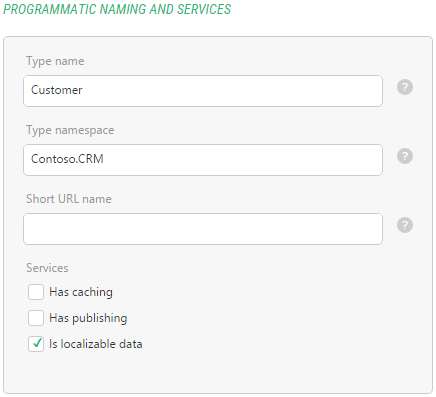
- On the Settings tab, place a check mark in the Is localizable data check box.
Figure 4: Localizing a data type being currently created
- Continue to create your data type.
Alternatively, you can first create your data type and then enable localization as described in the previous procedure.
Localization of data items is similar to localization of web pages. Before you localize an item, you should make sure that the item has the published status.
To localize a data item:
- Switch to the language you localize to.
- Expand the data type with the target item.
- Select the item and click Translate on the toolbar. The item editor form opens in the working area.
- Replace the values in the original language with those in the target language where necessary.
- Save the item.
- Repeat Steps 3-5 for as many items as you need.
- If there is no Enable Localization on the toolbar or in the context menu of a data type, make sure that you have at least two languages added in the system.
- If the item you want to localize is grayed (disabled), make sure you have the item published in the original language. This might be the case if the data type requires that items should be manually published.
- If you have created the item in Language A, and it does not exist in Language B, make sure that the translation language is set to Language A (View > Translation > From language). In other words, to see the item created in one language, you should select the latter as the translation language when switching to another language.