Internal Data Link Formats
Enable internal linking for data items
In C1 CMS version 5.0 or later, when editing content in Visual Editor, you can link to data items (like individual blog posts) the same way you link to pages and media files.
Note. This feature is only available for global data types and page data folder types.
Page data types can be used out-of-the-box. Global data types should meet these requirements:
- It has a field of the CMS Page reference type.
- It is attachable (and eventually attached) to a page via a tree definition.
- It filters its data by the page ID it is attached to (also via the tree definition).
You can enable internal linking to data items in one of the following ways - as Step 1:
- Providing the "short URL name" for dynamic data types
- Using the attribute
[InternalUrl]on static data types - Using the underlying API to register a custom internal URL provider (
IInternalUrlProvider)
The first two options use the API from the third option behind the scenes and produce this format for internal data item linking: ~/<type reference>(<data key value>), for example:
~/blog(87ea3c1e-bcd9-4c01-8c91-9eb338bde911)
(The third option is purely programmatic and allows you to more flexibly create formats of your choice.)
As Step 2, you should also have the system to resolve such a link properly. The simplest way is to create a CMS Function with a parameter of the RoutedData<T> type and insert it on the page the data type is associated with.
Enabling internal linking for dynamic data types
To enable internal linking to items of a certain dynamic data type, first:
- From the "Data" perspective, edit the data type (global or page data folder).
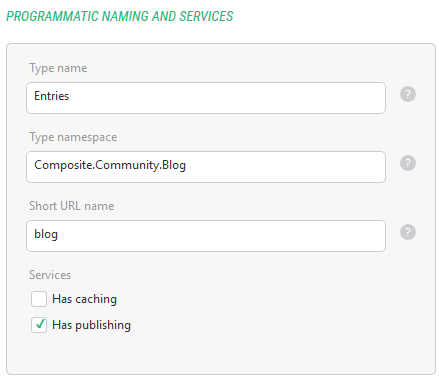
- On the "Settings" tab, in the "Short URL Name" field, specify the name to use for internal linking (for example, 'blog' for links like
~/blog(<key value>)). - Save the changes.
Next, make sure it contains a field of the CMS Page reference type. If it doesn't, add one.
Then, create a tree definition that attaches the data elements of this type to a specific page and make sure they are filtered by the page attached to.
Finally, attach the data type to a page as a CMS Console application (right-click a page, select "Add Application" and select the application you've created with the tree definition above.)
Enabling internal linking for static data types
To enable internal linking to items of a certain static data type:
- Edit the code where you have defined your data type.
- Add the
InternalUrlattribute to the data type. - In its parameter specify the name to use for internal linking to the data items of this type (for example, 'product' for links like
~/product(<key value>)). - Save the changes, rebuild and redeploy the DLL.
// ... some other code

[InternalUrl("product")]
public interface IProduct : IPageDataFolder
{
    // ... some other code

    string Name { get; set; }

    // ... some other code
}
This will be sufficient for static page data folders.
For static global data type, you will also need to specify a page because their internal links will work only when the page is rendered.
You can do this by registering a data URL mapper on the website startup, specifying the page.
[ApplicationStartup]
internal static class StartupHandler
{
    public static void OnBeforeInitialize()
    {
    }

    public static void OnInitialized()
    {
        Guid productsPageId = new Guid("...");

        // Use this overload when the URL format is defined by [RouteSegment(...)] attributes on a static data type ...
        DataUrls.RegisterGlobalDataUrlMapper<IProduct>(RoutedData.GetDefaultDataUrlMapper(productsPageId, typeof(IProduct)));

		// ... or use one of these specific mappers

        //DataUrls.RegisterGlobalDataUrlMapper<IProduct>(RoutedData.GetRoutedByIdDataUrlMapper(productsPageId, typeof(IProduct)));
        //DataUrls.RegisterGlobalDataUrlMapper<IProduct>(RoutedData.GetRoutedByLabelDataUrlMapper(productsPageId, typeof(IProduct)));
        //DataUrls.RegisterGlobalDataUrlMapper<IProduct>(RoutedData.GetRoutedByIdAndLabelDataUrlMapper(productsPageId, typeof(IProduct)));
    }
}
(Please make sure to provide the ID of the page represented by "..." in the sample above.)
Using a CMS Function with the RoutedData<T> parameter
Before using internal data links in Visual Editor, you have set up as described above, you should also ensure that C1 CMS "knows" how to resolve these new types of links.
The simplest way is to create a CMS Function with the RoutedData<T> parameter and insert it on the page the data folder or global data type is attached to.
Please see "Data URL Routing" for information about creating and using such a CMS Function.
Using internal data links in Visual Editor
Now that you've defined the short URL name for a data type, you can use it in Visual Editor.
- From the "Content" perspective, edit a page.
- Click the corresponding button on the toolbar to insert a link.
- In the "Link Properties", in the "URL" field, click the browse button.
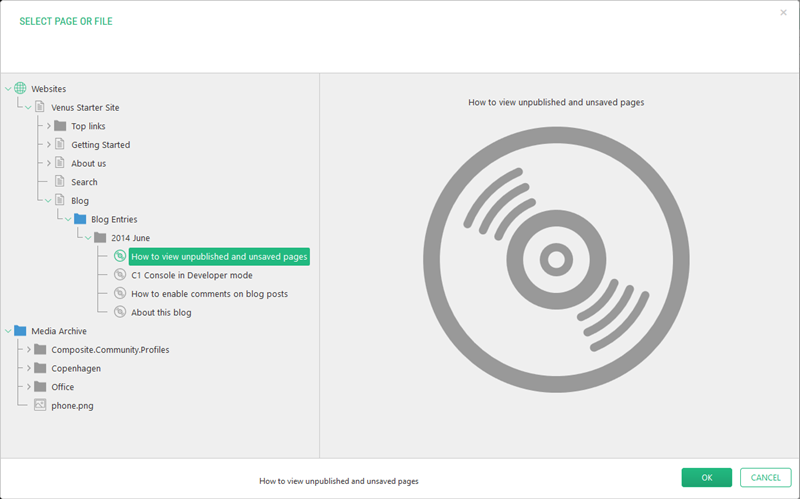
- In the "Select Page or File" window, locate and select the data item you wish to link to (for example, below the data folder or console application folder attached to a page).
- Save the changes.
Please note that when you select a data item in the tree, its label appears at the bottom of the "Select Page or File" window.
In the Source view, you will see the inserted link as something like ~/blog(fbbf1ba7-faed-4059-a64d-55e8baeed7db).
Requirements:
C1 CMS version 5.0 or later


